 |
Heart, Hands
Health, Hope
|
 |
|
 |
|
|
|
|
|
Old Glory Flag Afghan
Once again, we have worked hard to find an unusual way to raise funds. And this time, we used the talents of one of our team members.
We thought and thought, and decided to use this afghan as a silent auction item, with the winner receiving this beautiful afghan. As you can see, this afghan was not small, nor did it get finished quickly. To the winner of this auction, we congratulate you! You have something very special to help keep you warm during the winter months, and as a reminder of your willingness to help us to help others.
People often wonder why items such as this are sold for such a "great amount" of money. So we thought we would give you an opportunity to look inside of the making of this afghan. The following photos were taken during the different stages of production. The total time it took to make this afghan was approximately 45 hours. And this was the actual working on the afghan time. So you can imagine how long this took, with trying to work, raise a family, clean house, and enjoying a bit of life. We hope that the next time you see an item such as this, you will have a better understanding of the time and effort that goes into this project. Yarn alone to make this afghan was $25, so subtract that amount from the sale price, divide by 45 hours, and see how much "per hour" that person would make from doing this project. Puts things into perspective, doesn't it? And many special afghans, such as this, require the same dedication to creating. And we tip our hats to those that have the talent, and heart, to create such loving memories for others.
|
|
First we start with the star. Each of these stars are done separately. And there are a lot of stars!
After making the star, you have to also tuck in the ends of the yarn, so that they don't show. And with securing the tails, this helps to secure the shape of the star from everyday wear and tear, and from washing the afghan. And no one wants a star to unravel ever. |
|
|
Once the stars are done, they are next circled with the blue yarn. Each star is done separately as well.
Be sure to tuck the tails!
|
|
|
With the shape of the stars and the blue circling, there are several of these different shaped sections that are made, so that once everything is assembled, the shape is even. Keep following to see what we are talking about.
Once again, tuck the tails. Don't want them showing!
|
|
|
Once all the stars are circled in blue, they are put together. As you can see, this is a staggered pattern, so it takes some time to put them out and match them up.
Than, once that is done, each star is joined to the one beside it, both above and below, so that they form a solid piece.
Yep, remember to tuck the tails of all the yarn used for the joining.
|
|
|
Here is the stars joined! The odd shaped pieces go across the top and bottom, to fill in the spaces where the rows are staggered down. This makes the piece smooth on all ends.
Once all the stars and odd pieces are joined, the entire piece is crocheted around, to make it a smooth section and brings it all together nicely.
Less we forget, tuck the tails.
|

|
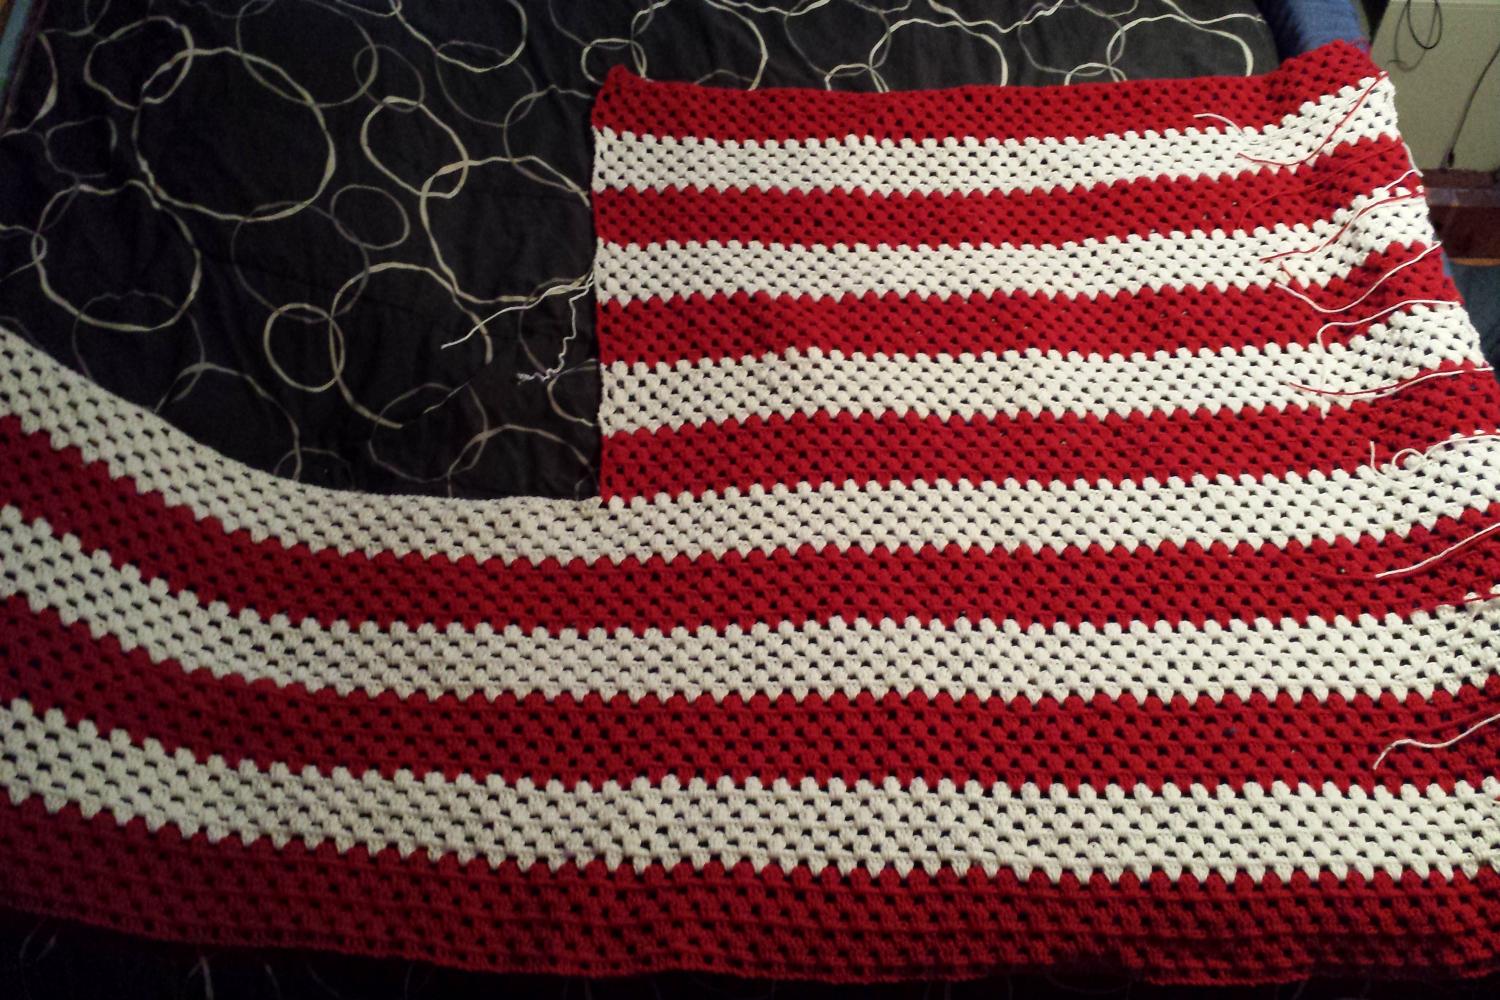
The next thing to do is to form the stars. As you can see, this involves doing an alternating pattern of red and white.
7 rows of red and 6 rows of white complete the stripes of our flag afghan.
|
|
|
When you reach row 6 of the stripes, the rows become shorter, as this is where the blue section will be inserted.
|
|
|
Yep, a lot of tails to tuck on the stripes. Make them secure, so they don't show!
|
|
|
Once you get the stripes all done, you match up the stars section and insert in, stitching it into the afghan.
Now, the entire afghan gets one more round of stitching around the outside, matching the colors as you go along.
Tuck all the tails in and make them secure.
You have now completed this amazing afghan! And it will bring joy to the receiver for many years to come.
|
| |
|
|
|
|
|
|
|
|
|
|
 |
